Sandy’s Vegan Gluten-free Pumpkin Tartlets The ‘Sweetest’ Sweet Potato Pie Vegan-licious Pumpkin Bread The ‘Overnight Sensation’ Chia Seed Pudding & Cashew Cream Topping The ‘No Excuse’ Couscous Cake The ‘Oh My’ Coconut Cream Pie The ‘Have Your Cake and Eat It Too’ Carrot Cake with Lemon Drizzle The ‘Anything But Square’ Brownie The Berry Maria Frozen Treat Green Tea Custard with Berries Sauce

October 12, 2012

Vegan-licious Pumpkin Bread

Newest

The Panic about Organic!

Guest Author: Brittany Cines

What’s with all the hype? Is it really worth splurging for that organic banana? In reality, when it comes down to nutrients there is very little difference. So why is everyone following in the trend towards purchasing organic produce?

First, let me explain what we are actually buying when we choose organic fruits and vegetables over the conventional types. According to the UDSA, ”Organic is a labeling term that indicates that the food or other agricultural product has been produced through approved methods that integrate cultural, biological, and mechanical practices that foster cycling of resources, promote ecological balance, and conserve biodiversity.” The USDA’s organic standards prohibit the use of synthetic fertilizers, sewage sludge, irradiation, and genetic engineering. Government-approved certifiers monitor the production process of organic produce to ensure that it abides by the government standards. It should be noted that despite these strict regulations, the government does not ensure that organic foods are safer or more nutritious than their conventional equivalents.

There are countless opinions about the organic debate. Before taking a stance, you should educate yourself about the advantages and disadvantages of choosing organic. Scientists have found that organic produce has a 30% lower risk of pesticide contamination than their conventional types. At the same time, it is important to realize that organic fruits and vegetables are not necessarily 100% pesticide-free. Furthermore, even the pesticide levels in non-organic produce fall within safe limits for consumption. With regards to nutrient content, organic foods have been shown to have higher levels of phosphorous, and chicken typically has higher omega-3 fatty acid levels. Except for these two slight differences, organic products have the same vitamin and mineral contents as their non-organic alternatives. Lastly, organic foods are typically twice the cost.

Let’s be realistic. We don’t all have the money to buy expensive organic produce for our families and what is the point if it won’t even make a huge difference to our health? Therefore, we need to decide when it is worth the extra few dollars for that organic piece of fruit, and when the conventional version will suffice. Each year the Environmental Working Group releases the ”Dirty Dozen,” which is a list of the 12 fruits and vegetables that contain the highest contamination levels. When determining which fruits and vegetables we should buy organic, this list may be a helpful reference. They also released a ”Clean 15” list of produce that are lowest in pesticides and would therefore make more sense to buy the conventional type. All in all, it may not be advantageous to buy organic produce if you are concerned with the nutrient content, since they are pretty much equivalent to their conventional alternatives. However, if you are worried about the consumption of pesticides, buying organic produce is worth the sacrifice, especially for the ”Dirty Dozen.”

Dirty Dozen
1. Peaches
2. Apples
3. Sweet Bell Peppers
4. Celery
5. Nectarines
6. Strawberries
7. Cherries
8. Pears
9. Grapes (imported)
10. Spinach
11. Lettuce
12. Potatoes

Sources:
http://www.health.harvard.edu/blog/organic-food-no-more-nutritious-than-conventionally-grown-food-201209055264
http://www.foodsafety.wisc.edu/HotTopics/Should_I_Choose_Organic_Foods.html
http://www.ams.usda.gov/AMSv1.0/nop


About Brittany

My passion for cooking really began when my mom signed me up for my first cooking classes at the age of 8. My love for food and cooking continued to grow stronger as I took every child, teen and adult class that was offered at my cooking school. Towards the end of high school, I expanded my love for cooking as I started to develop an interest in healthy eating. I graduated from the University of Maryland with a degree in Dietetics. Throughout college, I held a job as a Student Nutritionist for the University of Maryland Dining Services, and I interned at The National Institutes of Health, the Hebrew Home of Greater Washington, as well as at Suburban Hospital. In the fall I will begin my Dietetic Internship at the National Institutes of Health. Following the completion of this yearlong internship I plan to sit for my certification examination, in order to become a Registered Dietitian (RD). I am so excited to be involved with this blog, because it fits in perfectly with my passion, and it allows me to share some of the topics I have learned about in my nutrition courses and throughout work experiences.


If you enjoyed this post, subscribe for free to receive new recipes by email.

Sandy’s Vegan Gluten-free Pumpkin Tartlets

We live in the DC metro area and we had prepared for the worst before Hurricane Sandy struck the east coast. We are grateful that we did not experience the turmoil and devastation of our more northern kin. In fact, the Sandy that came to our house was sweet and gracious. She is our cousin’s lovely wife who we honor in the title of this recipe.

When we received an email that our cousins were without power and on their way south from New Jersey we tried our best to make our home a comforting spot for them. What better way to make them feel welcomed than to have our house smell of pumpkin pie baking? Making an allergy-friendly version would fit the bill perfectly.

Liana and I had never experimented with baking a gluten-free crust, but I was sure that we could adjust our recipe to work. Finding Kinnikinnick Gluten Free Graham Style Crumbs at our local Whole Foods made the task much easier. This product can be used the same way as other graham cracker crumbs. The crust is so yummy, your guests won’t be able to guess that it is gluten-free.

This recipe can be converted to a pie instead of tartlets by using one 8″ pie pan. The tartlets also cook a little faster than a pie, so adjust the baking time to one hour. Everything else can stay the same.

There is still so much that you can do to be of service to those in crisis from Hurricane Sandy. Please contact these organizations if you are able to help:
http://www.redcross.org/hurricane-sandy
http://www.animalleague.org/rescue/pet-rescue-programs/emergency-rescue/hurricane-sandy.html


Prep time: 20 minutes
Cook time: 55 minutes
Servings: 8
Difficulty: easy

Ingredients

Tartlet Crust:
1 box (10.5 ounces) Kinnikinnick Gluten Free Graham Style Crumbs
4 tablespoons Earth Balance buttery spread, melted
2 tablespoons maple syrup
2 teaspoons vanilla extract
Pinch sea salt

Tartlet Filling:
1 box (12.3 ounces) extra-firm silken tofu (we use the Mori-Nu brand that isn’t refrigerated and can be bought at Whole Foods or Mom’s Organic Market)
1 can (15 ounces) of organic pumpkin pureé
⅔ cup maple syrup
1 teaspoon vanilla
1 tablespoon pumpkin pie spice

Directions

1. Preheat your oven to 350° F. Position a rack in the center of the oven.
2. Spray eight 3″ diam. tartlet pans with canola baking spray and place on cookie sheets (this will make it easier to carry all the tartlets into and out of the oven).
3. To make the tartlet crust: Place the Graham Style Crumbs and sea salt into a bowl. Stir in the buttery spread, maple syrup and vanilla. The mixture should resemble wet sand. Firmly press a thin layer of the crust into the bottom and up the sides of eight tarlet pans. Bake the crusts until lightly colored, about 10 minutes. Cool completely before filling.
4. While waiting for the crusts to cool, start making the tartlet filling by thoroughly blending the tofu in a food processor.
5. Add pumpkin pureé, maple syrup, vanilla and pumpkin pie spice to the blended tofu and mix well.
6. Pour filling into tartlet crusts and bake for 45 minutes.
7. Once the tartlets are cooled, place them in refrigerator for about an hour until firm to the touch. Serve and enjoy!

If you enjoyed this post, subscribe for free to receive new recipes by email.

The ‘Sweetest’ Sweet Potato Pie

We are told that sweet potato pie is considered a dessert, but we want to challenge this notion. We think that this recipe can also serve as a side dish. Yes… it is sweet, which makes it the perfect dessert. But it also doesn’t have all the unhealthy ingredients that are in most desserts. Now you see our dilemma. We will leave it up to you, but you have to admit that it is a great argument for another helping of dessert!

Sweet potatoes are high in antioxidants and are a part of an anti-inflammatory diet. A number of serious medical conditions, including type 2 diabetes, Alzheimer’s disease, stroke, cancer and even asthma, have been linked to inflammation in the body according to the University of Wisconsin. While most serious issues require medical help, choosing foods to reduce inflammation in your body is a great step forward in taking control of your own health.

Sources:
http://www.fammed.wisc.edu/sites/default/files//webfm-uploads/documents/outreach/im/handout_ai_diet_patient.pdf
http://www.med.umich.edu/umim/food-pyramid/seasonings.htm

Ingredients

Pie Filling:
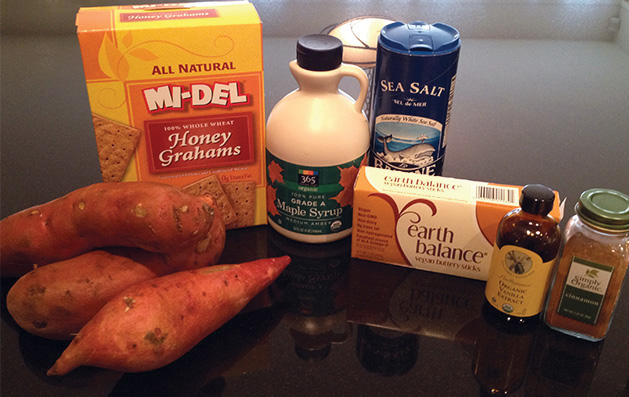
3 medium-sized sweet potatoes
1 teaspoon cinnamon
1 cup maple syrup
Pinch sea salt

Pie Crust:
Adapted from Mi-Del graham cracker box
1 (8-ounce) sleeve Mi-Del Graham crackers (about 25 crackers)
5 tablespoons Earth Balance buttery spread, melted
2 tablespoons maple syrup
2 teaspoons vanilla extract
Pinch sea salt

Directions

1. Preheat your oven to 350° F. Position a rack in the center of the oven.
2. To make the pie crust: In a food processor, pulse the graham crackers and sea salt until finely ground. Transfer the mixture to a bowl. Stir in the butter, maple syrup and vanilla. The mixture should resemble wet sand. Press the crust evenly into the bottom and up the sides of a 8-inch pie plate. Bake the crust until lightly colored and dry to the touch, about 15 minutes. Cool completely before filling.
3. While waiting for the crust to cool, start making the pie filling.
4. Wash, peel and cut the sweet potatoes into chunks.
5. Place the sweet potatoes into a pressure cooker with about an inch of water and cook for 20 minutes.
6. Drain the cooked sweet potatoes and put them into a food processor and puree until smooth.
7. Add cinnamon and maple syrup and mix well.
8. Pour into pie crust and smooth with a spoon.
9. Sprinkle top of pie with cinnamon and a touch of sea salt. Serve warm.

If you enjoyed this post, subscribe for free to receive new recipes by email.

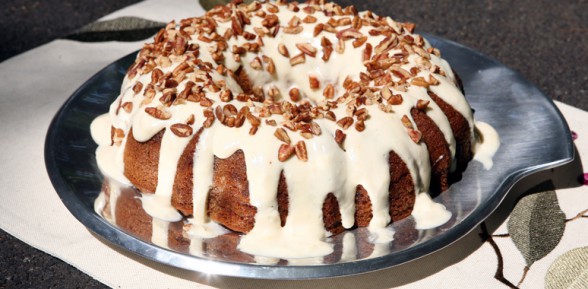
Vegan-licious Pumpkin Bread

There are no tricks here… only treats for your taste buds! This yummy-ized pumpkin bread is so moist and rich with flavor that you will forget it is free of dairy and refined sugar.

As we welcome Autumn, it’s time for our favorite pumpkin recipes. Pumpkins are rich in the antioxidant beta-carotene which might be a key in the prevention of cancer. They are also full of vitamin A, potassium, and dietary fiber.

Have you ever baked with avocado oil? We experimented with it for this recipe and it worked wonderfully. The avocado is one of the healthiest fruits in the world and its oil is loaded with good fats and vitamin E. Experiment with it the next time a recipe calls for another kind of oil and let us know what you think!

Sources:
http://ndb.nal.usda.gov/ndb/foods/show/3209
http://www.cancer.gov/cancertopics/factsheet/prevention/antioxidants
http://www.medicalnewstoday.com/releases/244436.php

Ingredients

2 cups whole wheat flour

2 teaspoons cinnamon

1½ teaspoons baking powder

½ teaspoon baking soda

½ teaspoon sea salt

15 oz. pumpkin purée

⅓ cup avocado oil

⅔ cup maple syrup

1 teaspoon vanilla extract

½ cup unsweetened soy milk

1 teaspoon Cafix grain coffee dissolved in 1 tablespoon water

6 oz. firm silken tofu

Directions

1. Preheat your oven to 350° F and spray a bread pan with canola baking spray
2. Combine the whole wheat flour, cinnamon, baking powder, baking soda, and sea salt in a large bowl
3. In a blender, pulse the pumpkin purée, avocado oil, maple syrup, vanilla extract, soymilk, dissolved grain coffee, and tofu until smooth
4. Pour the wet mixture into the dry and stir until fully combined
5. After the mixture has been stirred thoroughly, pour the batter into the greased bread pan and bake for 35-40 minutes until the bread has risen and golden brown

If you enjoyed this post, subscribe for free to receive new recipes by email.

‘Orange You Glad It’s Sunday’ Orange Cranberry Pancakes

Who has time to make pancakes from scratch on a weekday? Sundays are the only pancake days in our household. These thin, round cakes are the best way to start off the week with your family or to add something special to a more formal brunch. Freeze them and you might be able to bring just a little bit of “Sunday” to your weekday.

The dried cranberries happen to be our favorite ingredient in this recipe. They are a little tangy and with no cholesterol, sodium or fat, they can do no wrong. In fact, cranberries have been studied in the hope of treating or preventing a variety of illnesses such as urinary tract infections or Helicobacter pylori (H. Pylori) infections that can produce stomach ulcers. A recent study suggests that cranberries might also prevent dental plaque. And finally, they have also been reported to be an excellent source of antioxidants and possibly to have anticancer properties.

Let us know if your next Sunday is a pancake one! Enjoy.

Sources: http://www.fns.usda.gov/fdd/facts/hhpfacts/New_HHPFacts/Fruits/HHFS_CRANBERRIES_DRIED_A291_Final.pdf
http://nccam.nih.gov/health/cranberry

Ingredients

1 cup whole wheat flour
1 tablespoon hazelnut meal
1 tablespoon wheat germ
1 teaspoon Ener-g Egg Replacer
1½ teaspoons baking powder
pinch of salt
1 cup plain soy milk
1 tablespoon agave nectar
¼ cup canola oil
1 teaspoon orange zest
3 teaspoons orange juice
½ cup dried cranberries

Directions

1. In a large bowl, combine the flour, hazelnut meal, wheat germ, Ener-g Egg Replacer, baking powder and salt.
2. In a smaller bowl, mix the soy milk, agave nectar, canola oil, orange zest, orange juice and dried cranberries.
3. Make a well in the center of the flour mixture and pour in the soy milk mixture; whisk until the batter is smooth.
4. Heat a lightly oiled griddle or frying pan over medium high heat. Pour or scoop the batter onto the griddle, using about a ¼ cup for each pancake. Lightly brown on both sides.
5. Sprinkle a few cranberries on top and serve hot.

If you enjoyed this post, subscribe for free to receive new recipes by email.

Toto, I Don’t Think We Will Find Tofu Here Anymore!

My husband and I were on autopilot the evening that we drove to our favorite local vegan restaurant, The Vegetable Garden. Granted, we hadn’t been there in a few weeks, but we weren’t expecting what we had found. The restaurant was dark, there was a stench of sewage and the anchor, Next Day Blinds, had been replaced with a sex shop.  As I stared dumbfounded at the mannequin in crotchless underwear in the window, I felt a kinship to Dorothy when she landed in Oz.

With The Vegetable Garden gone we would now have to travel to Sunflower restaurant in Vienna Virginia. That would need to be a trip for another day. Traveling to Sunflower would take more time than my hunger would allow.

Please humor me as I take this valuable blog space, that usually goes to a recipe or nutritional posting, to vent my frustration about the lack of local vegan options. It is important to frequent restaurants and stores that supply healthy foods. The McDonald’s, Dunkin’ Donuts and Krispy Kremes are doing just fine.

In an effort to support these small independents, let us know your favorite neighborhood restaurant that has a healthy menu. Who knows, maybe I won’t have to travel to Vienna the next time I am craving Crispy Seitan?

If you enjoyed this post, you will love our recipes even more! Subscribe for free to receive new recipes by email.

Fishing for Omegas!

Guest Author: Brittany Cines

As I am on vacation cruising through Alaska, I can certainly say that I have had my fair share of omega-3s for the week. While there are many sources of omega fatty acids, fish is just one of them.

When considering the three macronutrients, fats don’t typically get a lot of credit. However, it is important to keep in mind that they are a source of energy, in addition to protein and carbohydrates. In fact, fat provides 9 calories per gram of energy, while protein and carbohydrates provide just 4. Fats are also beneficial because they help us maintain healthy skin and hair, absorb our fat-soluble vitamins, and provide us with essential fatty acids. While fat is an extremely valuable nutrient, not all fats are considered equal!

Most of our fat should come from unsaturated fats, because unlike saturated fats, these help lower our blood cholesterol. The two types include monounsaturated and polyunsaturated fats. Omega-3s and omega-6s are a type of polyunsaturated fat. They are known as essential fatty acids, meaning they must be obtained from food because the body does not create them for us. Therefore, it is our job to monitor our diets to ensure we are consuming enough of each.

The consumption of omega-3 fatty acids are of most concern. Omega-3s are found in cold-water fish, such as salmon, tuna, halibut, sardines, herring, and mackerel. While we aren’t all fortunate enough to be surrounded by an abundance of fresh fish like in Alaska, there are in fact other sources of omega-3s. Dark green leafy vegetables, flaxseed, walnuts, and vegetable oils, such as soybean, canola, and flaxseed oil also contain this popular fatty acid. The benefits of omega-3 fatty acids are enormous. For instance, omega-3s are good for our heart, prevent inflammation and blood clotting, lower our cholesterol and triglyceride levels, reduce blood pressure, and lower the risks and symptoms for many diseases, including diabetes, stroke, cancer, etc.

Let’s not forget the other essential fatty acid, omega-6. While omega-6s are just as important as the omega-3s, most of us consume adequate amounts in our diets that we do not need to be as cautious. Some of the positive effects of omega-6 fatty acids include their role in brain function, growth and development, skin and hair growth, metabolism regulation, and maintenance of the reproductive system.

In order for the essential fatty acids to work properly in our body we must have a balance of the two. To ensure this healthy ratio, it is recommended that Americans eat fish at least twice per week. If we are unable to consume enough omega-3s through food sources, fish oil supplements can be taken, although they are not the preferred form. Monitor your intake of essential fatty acids before something in your body begins to smell fishy!

Sources:
http://www.nlm.nih.gov/medlineplus/ency/article/002468.htm
http://www.nlm.nih.gov/medlineplus/ency/imagepages/19302.htm
http://www.umm.edu/altmed/articles/omega-6-000317.htm
http://www.umm.edu/altmed/articles/omega-3-000316.htm


About Brittany

My passion for cooking really began when my mom signed me up for my first cooking classes at the age of 8. My love for food and cooking continued to grow stronger as I took every child, teen and adult class that was offered at my cooking school. Towards the end of high school, I expanded my love for cooking as I started to develop an interest in healthy eating. I graduated from the University of Maryland with a degree in Dietetics. Throughout college, I held a job as a Student Nutritionist for the University of Maryland Dining Services, and I interned at The National Institutes of Health, the Hebrew Home of Greater Washington, as well as at Suburban Hospital. In the fall I will begin my Dietetic Internship at the National Institutes of Health. Following the completion of this yearlong internship I plan to sit for my certification examination, in order to become a Registered Dietitian (RD). I am so excited to be involved with this blog, because it fits in perfectly with my passion, and it allows me to share some of the topics I have learned about in my nutrition courses and throughout work experiences.


If you enjoyed this post, subscribe for free to receive new recipes by email.

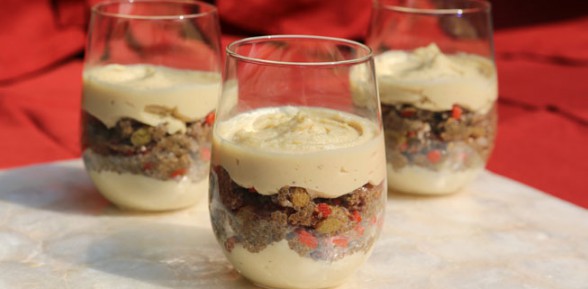
The ‘Overnight Sensation’ Chia Seed Pudding & Cashew Cream Topping

This is the perfect dish to make if you happen to be ADD (there is no shame… most of my favorite people are) or can’t be bogged down in the kitchen for too long. You mix up the ingredients the day before, set it aside in the fridge and then do a couple of things right before serving it. I always have a batch ready or awaiting its final touches.

Would you believe that the 80’s pop culture phenomenon, the ch- ch- ch- chia pet, was actually made using the same chia seeds that seem to be so popular these days? We underestimated these power packed seeds. Ounce for ounce, they actually have more calcium than skim milk and more omega-3 fatty acids than salmon.

Another seemingly magical quality that the chia seed possess is that they help to curb your appetite. They expand when they are wet (see disclaimer in next paragraph) so they help your belly feel more full after you eat them. We have been making this recipe for a few months now and I have to admit that after eating a serving of the pudding for breakfast, I often feel more energetic and my appetite seems subdued. I have actually been surprised when lunchtime comes and I haven’t reached for a snack.

A kind warning about these innocuous looking little seeds. You might say to yourself, “These are delightfully crunchy and so good for you. I should try them on top of some cereal or oatmeal.” Do not attempt this without leaving your house with a pocket mirror and dental floss. The chia seed expands to almost three times its size when wet. You might not see a seed in your teeth right after you eat them but just give them an hour or two. You can thank The New Yummy for this tidbit when you spot one!

Sources:
http://www.drweil.com/drw/u/QAA365093/Chia-for-Health.html

Ingredients

Chia Seed Pudding:

½ cup chia seeds

1½ cup unsweetened soy milk

3 tablespoons virgin and unrefined coconut oil

1 teaspoon cinnamon

2 teaspoons almond extract

pinch of salt

1 cup dried berries (Any kind of dried berry that is your favorite. We used golden raisins, mulberries, goji berries, and blueberries.)

5 tablespoons organic blue agave syrup


Cashew Cream Topping:

1 cup raw cashews

1½ cups apple juice

2 tablespoons coconut oil, melted

5 tablespoons organic blue agave syrup

¼ cup unsweetened soy milk

1 teaspoon vanilla extract


Directions

1. In a medium sized bowl, add the coconut oil and the soy milk and whisk.
2. The coconut oil will be lumpy. Whisk until the larger pieces are gone.
3. Add the chia seeds, cinnamon, almond extract, salt and agave syrup.
4. Mix well and add the dried berries.
5. Cover the chia seed mixture with plastic wrap and place in refrigerator overnight.
6. Start making the cashew cream in a smaller bowl by adding apple juice to the raw cashews. Make sure that the apple juice covers the cashews completely. Add more juice if necessary.
7. Cover the cashew/juice mixture with plastic wrap and place in refrigerator overnight.
8. The next day, drain the cashews and place in a food processor.
9. Add coconut oil, agave syrup, soy milk and vanilla extract and pulse until smooth.
10. Serve the chia pudding with the cashew cream by putting a small amount at the bottom of a dish and layering the pudding. Put a small amount as a topping.
The pudding can, of course, be eaten without the cashew cream. We add this for a special treat.

If you enjoyed this post, subscribe for free to receive new recipes by email.

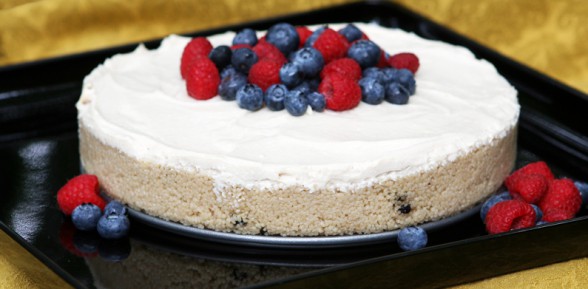
The ‘No Excuse’ Couscous Cake

Try to find a reason to say no to seconds of this Couscous Cake. It is a tough proposition. Read the following paragraphs and you might eat the entire dessert!

There are a lot of good things to say about this dessert. It is made of whole wheat couscous which contains iron, fiber and protein. The Harvard School of Public Health recommends you get 20 to 30 g of fiber each day. It also has tahini which is made from sesame seeds. These magical seeds are loaded with protein, thiamin, vitamin B6, calcium, iron, magnesium and copper.

Along with the dried blueberries and the tofu topping, this dairy-free and refined sugar-free couscous cake makes for a light dessert that is perfect for the summer.

Sources:
http://www.hsph.harvard.edu/nutritionsource/what-should-you-eat/fiber-full-story/
http://nutritiondata.self.com/facts/nut-and-seed-products/3070/2


Ingredients

Couscous Cake:

6  cups apple juice

1 tablespoon vanilla extract

½ tablespoon lemon zest

3 cups whole wheat couscous

pinch of salt

⅛ cup dried blueberries

Topping:

16 oz. extra-firm silken tofu, patted dry  (we use the boxed Mori-Nu brand that isn’t refrigerated bought at Whole Foods or Mom’s Organic Market)

½ tablespoon lemon zest

½ tablespoon tahini

1 teaspoon vanilla extract

⅛ teaspoon cinnamon

½ cup maple syrup

½ tablespoon tapioca starch

¾ teaspoon Ener-G Egg Replacer whisked into 1 tablespoon warm unsweetened soy milk

Pinch of salt

Directions

1. In a large saucepan, place the apple juice, vanilla, salt, lemon zest and whole wheat couscous and bring to a boil.
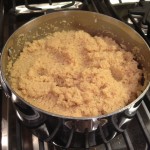
2. As your stir the boiling mixture the couscous will soak up the liquid and become thick, see smaller picture below.
3. Turn off the heat and mix in the dried blueberries.
4. Pour this mixture into an 8″ springform pan and set aside until cool.
5. In a food processor, combine all the topping ingredients and blend well.
6. Pour the topping over the cake that is in the springform pan.

7. Place the completed cake into the refrigerator and let chill for 3 hours.
8. Once the cake and topping have set, release the springform and place berries on top the cake before serving.

If you enjoyed this post, subscribe for free to receive new recipes by email.

The ‘Oh My’ Coconut Cream Pie

A creamy coconut pie that has no dairy cream? We wouldn’t lie to you. Did we mention the chocolatey graham cracker crust? That’s where the ‘Oh My’ comes in!

A key ingredient in this pie is, of course, coconut. This botanically classified fruit or drupe, has been in the news a lot lately. There is good reason for it. Coconut milk contains lauric acid, capric acid and antimicrobial lipids, which have antifungal, antiviral and antibacterial properties. It also contains fatty acids that kill the three major types of bacteria that cause the formation of plaque in the arteries which may lead to heart disease. There is also research to back up the claim that coconut milk helps with weight loss. According to Bruce Fife, N.D., in his article “The Fat that Can Make You Thin,” people who include more healthy fats in their diets, like coconut milk, feel more full during meals and as a result eat less than those who don’t get enough fat in their diets. Other health benefits of coconut milk include: strong bones, prevention of anemia, a decreased risk of joint inflammation, and it helps to lower high blood pressure and keeps the prostate gland healthy.

Believe me, knowing that all this good stuff is in your dessert makes it a lot more fun to eat. Enjoy!

Ingredients

Pie Filling:

12.3 oz. package extra-firm silken tofu (we use the boxed Mori-Nu brand that isn’t refrigerated bought at Mom’s Organic Market)

8 oz. package Tofutti cream cheese

¼ cup Tofutti sour cream

¾ cup coconut milk

1½ cup unsweetened shredded coconut

¼ cup toasted unsweetened shredded coconut

½ cup agave syrup

¼ teaspoon stevia extract


Pie Crust:
Modified from Mi-Del graham cracker box

1 (8-ounce) sleeve Mi-Del Graham crackers (about 25 crackers)

5 tablespoons Earth Balance buttery spread, melted

1½ tablespoons coco powder

4 tablespoons maple syrup

2 teaspoons vanilla extract

Pinch sea salt


Directions

1. Preheat your oven to 350° F. Position a rack in the center of the oven.
2. To make the pie crust:  In a food processor, pulse the graham crackers, coco powder and salt until finely ground. Transfer the mixture to a bowl. Stir in the butter, syrup and vanilla. The mixture should resemble wet sand. Press the crust evenly into the bottom and up the sides of a 9-inch pie plate. Bake the crust until slightly darker in color and dry to the touch, about 15 minutes. Cool completely before filling.
3. While waiting for the crust to cool, start making the pie filling by adding all the filling ingredients, except for the toasted coconut, into a food processor.
4. Blend well and pour into pie crust.
5. Sprinkle the toasted coconut onto the top of the pie.
6. Bake pie for 30 minutes. It should be slightly golden on top when done.
7. Allow the pie to cool before placing it into refrigerator for a couple of hours. Make sure the pie is cool and firm to the touch before serving.

If you enjoyed this post, subscribe for free to receive new recipes by email.